

Build your own Github Action and publish to the Github Marketplace!
Github Actions is always been a hot and interesting topic. The way it automates workflows makes the life of a developer easy. Why not create your own!


Introduction:
Automation, complexity reduction, reproducibility, and maintainability are all advantages that can be realized by a continuous integration (CI) pipeline. With GitHub Actions, you can build these CI pipelines.
"Automate, customize, and execute your software development workflows right in your repository with GitHub Actions. You can discover, create, and share actions to perform any job you'd like, including CI/CD, and combine actions in a completely customized workflow." - Github Docs
We all use Github Actions for code analysis, adding awesome Readme features and doing many other things. When I was first introduced to Github Actions I was dumbstruck and from then onwards it became my favorite section to explore. I started exploring it, used it in my profile Readme and it was really awesome.
But the problem was I was using the products which were created by others and it kind of hurt me😅. So I was like - "Let's create a Github Action on own and then publish it in the marketplace so that others can use it". And guess what I did, you can check it on Github. In this blog we are going to make a Github Action so tighten your seat belt, it'll be fun.
Prerequisites:
- A Github account
Steps:
- Create a Github repository with a license (any, I've used MIT License).
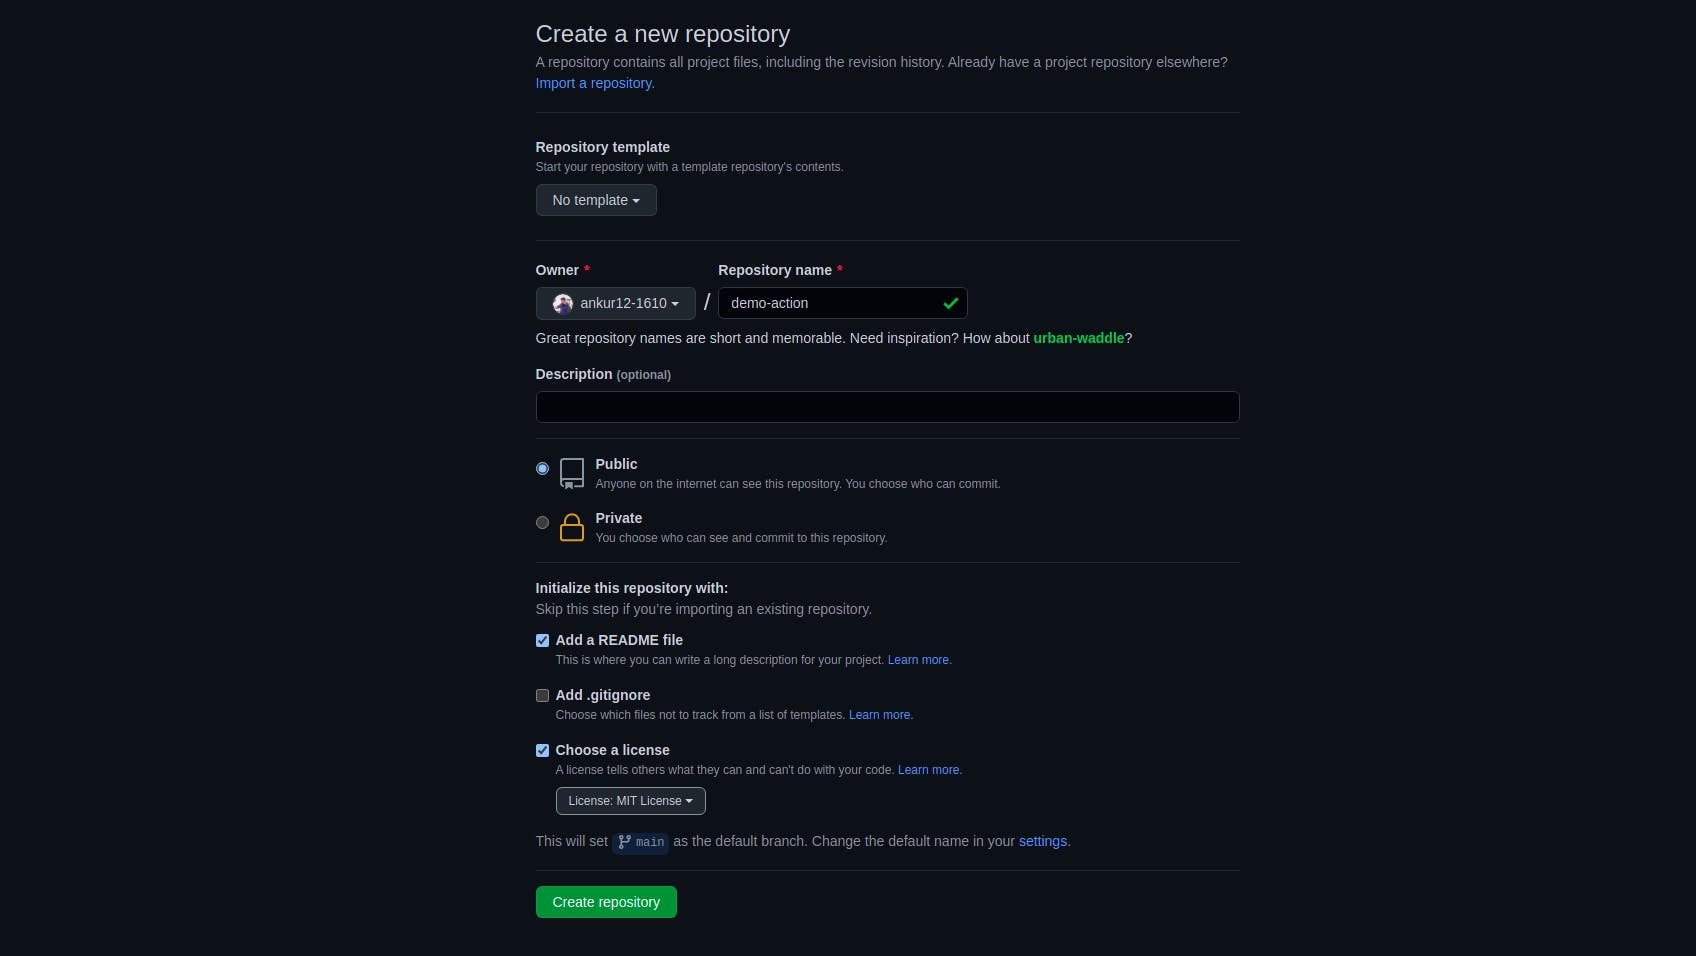
- Clone the repo to your local machine and open it in your favorite IDE.
Setup a node project with:
npm initand install all the required packages by following commands:
npm i @actions/core npm i @actions/exec npm i @actions/github npm i @vercel/ncc@vercel/nccis a Simple CLI for compiling a Node.js module into a single file.After installing packages make sure to add this script in
package.json:"scripts": { "build": "ncc build src/main.js -o dist" }This script is important as it runs
@vercel/nccwhich compiles all the files to a single filedist/index.js.- Now, we create an
action.ymlfile in our repository. Theaction.ymlis the metadata file and defines the inputs, outputs, and main entry point for our Action.
The action.yml file has to include:
name: The name of your Github Action.description: A short description of what your action is doing.author: The name of the author who created this Github Action.inputs: The input parameters which you can pass into your script.runs: Defines what the action will execute (in our case, it'll run docker).branding: How your Github Action will look like when it is launched in the marketplace.
The action.yml file will look like-
name: Demo Issue Action 🛰
description: Comments on the newly opened issue.
author: ankur12-1610 <anknerd.12@gmail.com>

inputs:
  GITHUB_TOKEN:
    description: Github token
    required: true
  ISSUE_COMMENT:
    description: Comment to be added on opening an issue
    required: true

branding:
  color: blue
  icon: tag

runs:
  using: 'docker'
  image: 'Dockerfile'
- Now, create a folder namely
srcand in that create a filemain.js. This file includes the main script of the action, it is like the brain of the action. - In our case, we are creating a Github Action which will comment on every issue created. For this, we need
@octokit/restnpm package. It is the GitHub REST API client for JavaScript.For its API endpoints and other details go through its official docs.
- So my
main.jswill look like this:
const core = require('@actions/core')
const github = require('@actions/github')

export async function run() {
    try {
    const { context } = require('@actions/github')

    //taking input from the core
    const GITHUB_TOKEN = core.getInput('GITHUB_TOKEN')
    const ISSUE_COMMENT = core.getInput('ISSUE_COMMENT')

    if ( typeof GITHUB_TOKEN !== 'string' ) {
      throw new Error('Invalid GITHUB_TOKEN: did you forget to set it in your action config?');
    }

    if ( typeof ISSUE_COMMENT !== 'string') {
        throw new Error('Invalid ISSUE_COMMENT field, it should be a string field')
    }
    const octokit = github.getOctokit(GITHUB_TOKEN)
    const { issue } = context.payload
    const payload = context.payload.issue
    //comment on issue
    await octokit.rest.issues.createComment({
      ...context.repo,
      issue_number: issue.number,
      body: ISSUE_COMMENT,
    })

  } catch (e) {
    core.error(e)
    core.setFailed(e.message)
  }
}

run()
- The last step would be to create a file namely
Dockerfile.If you are not familiar with Docker and Dockerfiles, check out Dockerfile support for GitHub Actions.
The Dockerfile will look like:
FROM node:latest

COPY . .

RUN npm install --production

ENTRYPOINT ["node", "/dist/index.js"]
That's it. We've created our won Github Action. Now to test it, create a workflow file in .github/workflows and this code:
name: 'Demo Issue Action 🛰'

on:
  issues:
    types:
      - opened

jobs:
  test:
    runs-on: ubuntu-latest
    steps:
      - uses: actions/checkout@v2
      - name: 🔃 Install
        run: |
          yarn
      - name: 🧱 Build
        run: |
          yarn build
      - uses: ./
        with:
          GITHUB_TOKEN: ${{ secrets.GITHUB_TOKEN }}
          ISSUE_COMMENT:  'thanks for raising the issue'
How others can use my Action?:
The answer is simple just paste the following code in the .github/workflows directory in required repo:
name:  'Demo Issue Action 🛰'

on:
  issues:
    types:
      - opened

jobs:
  test:
    runs-on: ubuntu-latest
    steps:
      - uses: actions/checkout@v2
      - uses: ankur12-1610/demo-action@main
        with:
          GITHUB_TOKEN: ${{ secrets.GITHUB_TOKEN }}
          ISSUE_COMMENT:  'thanks for raising the issue' #enter custom message
And now we are all perfect to launch it in the Github Marketplace.
Publish the Action to the Marketplace:
- Go into the the
New Releasesection and you will find this window: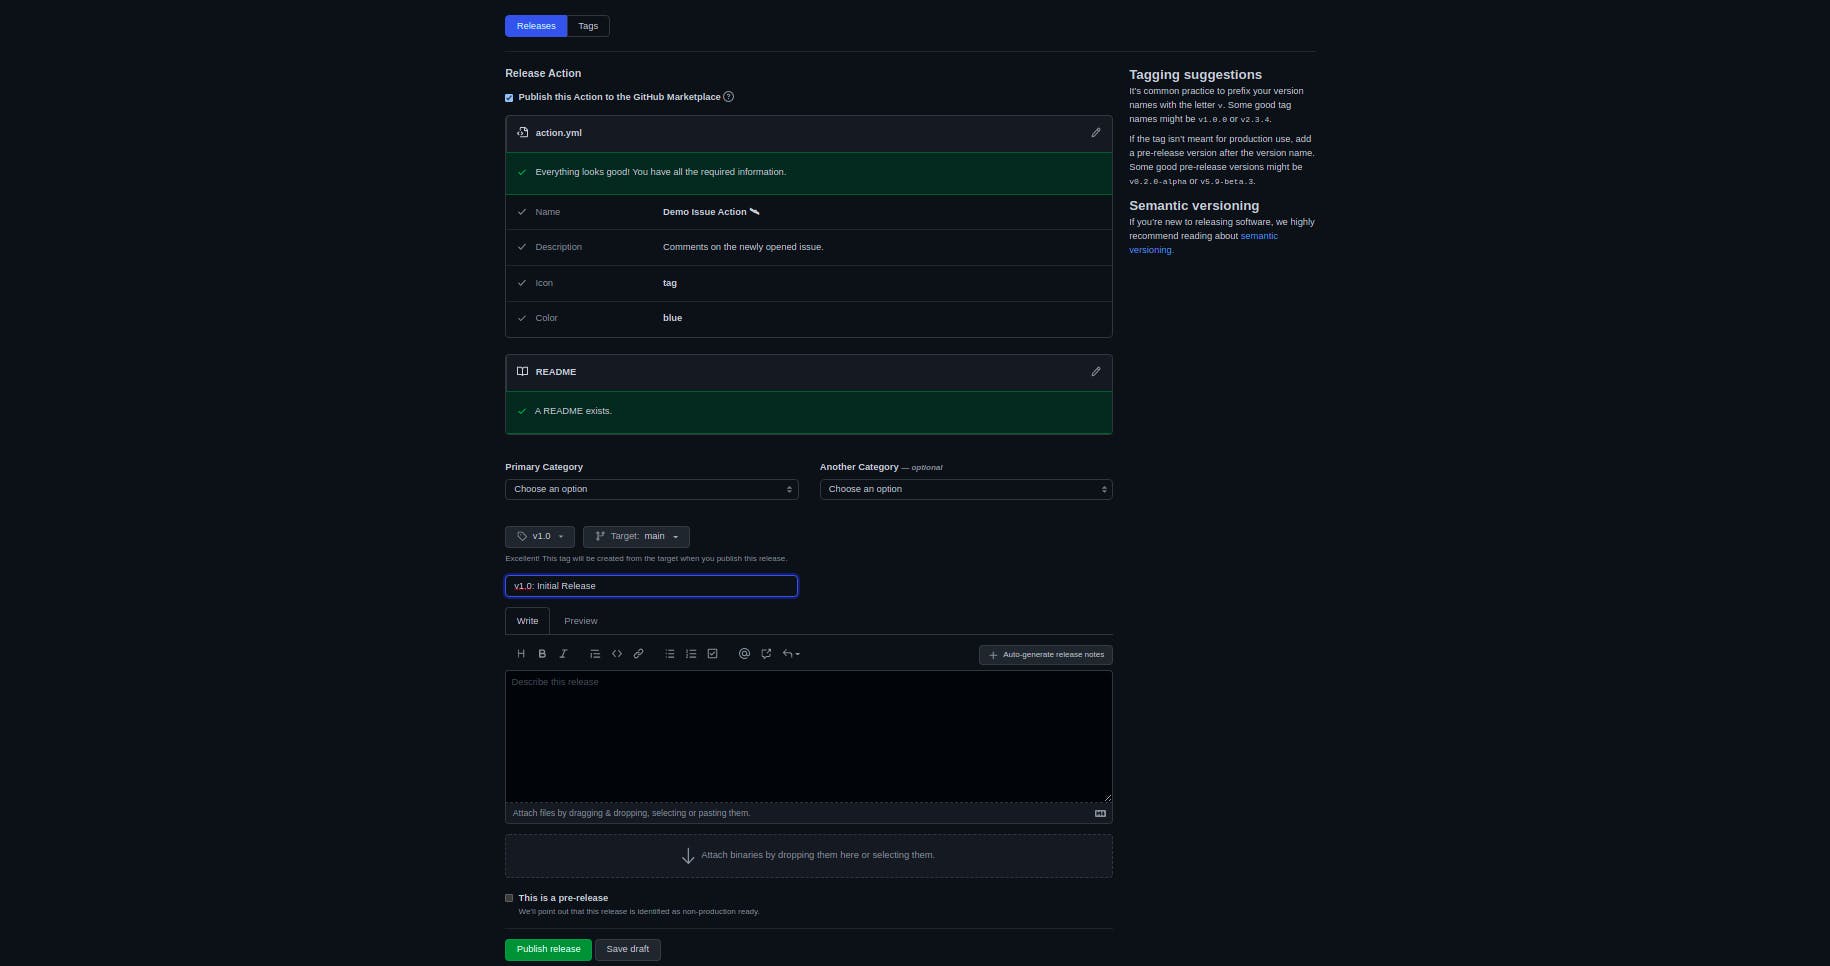
Create new release tag, give release heading to the Action and publish it ;)
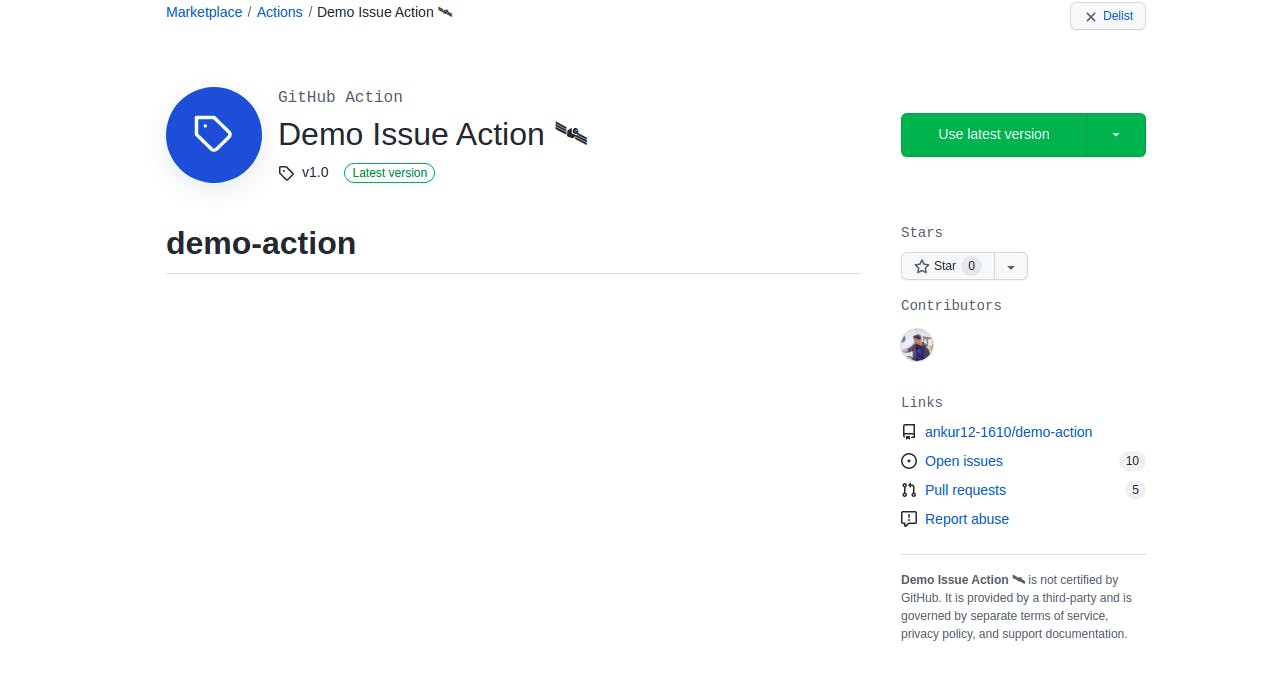
- Finally, we can find it on github.com/marketplace by searching "Demo Issue Action 🛰”.
Conclusion:
Thank you for reading, hope you enjoyed the article! Queries and feedback are most welcome :) kindly leave them below.
Follow me on Twitter | LinkedIn for more web development-related tips and posts.
That's all for today! You have read the article till the end.